
Dance Party
How to create the Dance Party project in Srcatch Jr?
In this lesson, you will create your first project in Scratch Junior, set up, and complete your first project. This is a series of tutorials on scratch jr, visit this page to get regular updates!
Make sure that you have installed the Scratch Jr app. If not, then click the download button below!
Download ScratchJr for Computer Download Scratch Jr for MobilesStep 1: Open Scratch Jr App
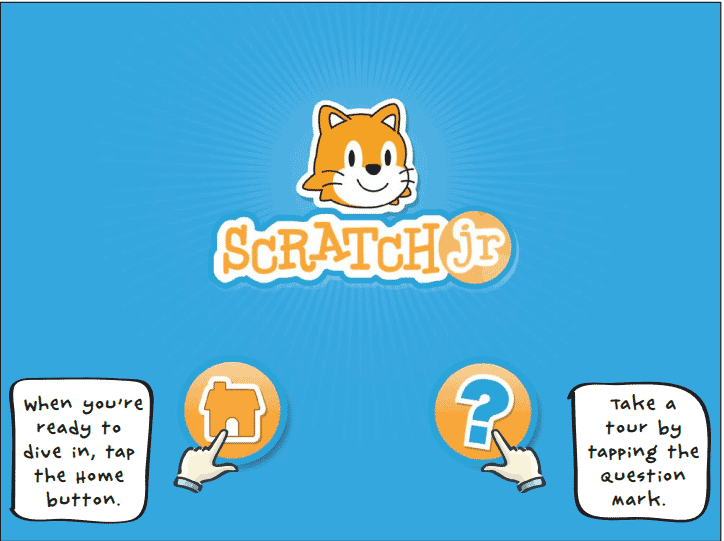
This is the first screen you’ll see when you open the ScratchJr app. Tap the Home button on the left.
Step 2: Create a New Project on Screatch Jr
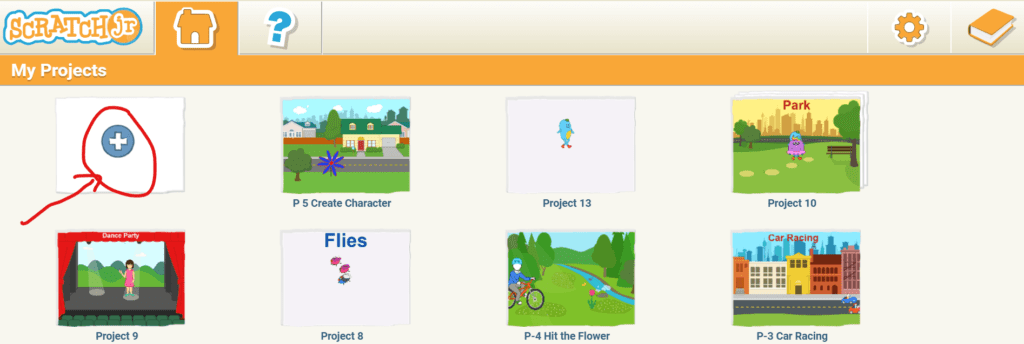
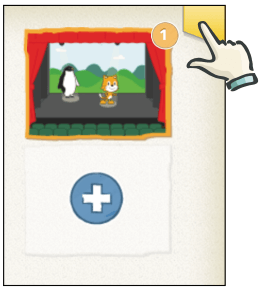
Once you click the Home Button on the above-given page, it will open the home screen of the scratch jr app. The home screen shows all of your saved ScratchJr projects. In the following picture, you can see seven projects that have already been created.
If this is the first project that you are creating, you’ll see only the plus sign only, I have marked the plus sign with a red circle and an arrow here to help you identify it. Click the plus sign to make a new project.
Step 3: Make the Sprite / Cat Move!
Do you see the page here, this is where the magic happens!
You can create amazing animations, silly stories, and great games—all from the ScratchJr editor. Whatever you create will play in the center of the screen. We call this area the stage.

Whenever you start a new project, each new project will start with this sprite, ScratchJr cat. To make the cat move, we can use the motion blocks, which are in the blue palette of programming blocks. Use your finger to drag one of the blue arrow blocks to the programming area.

Click the blue block, and the cat moves in the direction of the arrow!
You can drag more motion blocks to the programming area and snap them together to make a sequence of actions, which we call a script.
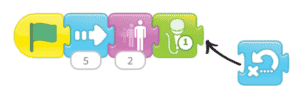
Add some more blue motion blocks to make the cat dance.
Can you guess what movement each block makes?
Experiment to see which blocks make the best dance.
To run the script and see the cat dance, Click on any of the blocks in the script. Notice that the script runs from the beginning no matter which block you click, and each block is highlighted as it runs.
Congratulations! You just made your first computer program!
Now let’s turn it into a dance party!
Step 4: Use the Green Flag
You can run your project in different ways instead of clicking on the scripts. One of the most common ways is to use the Start on Green Flag block to start your script.
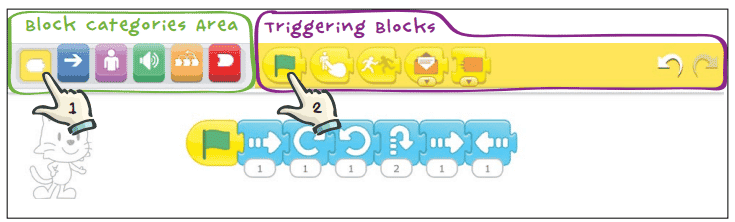
First, click on the yellow button in the block category area to show the triggering blocks. Select the Start on Green Flag block and drag it to the programming area. Remember to snap the blocks together to make them work in a sequence.
So, now snap the Start on Green Flag block onto the front of your script.
Now tap the Green Flag button at the top of the screen.

Now, you can see the cat dancing just like it did when you clicked on the script in the previous stage!
Did you notice more blocks in the triggering blocks area?
You will learn about how to use all the blocks to make projects, games, stories, and animations in the upcoming lessons. So, get tuned and also subscribe to the STEM Guide YouTube Channel to get video tutorials.
Step 5: Add a Background on Scratch Jr
Hey! Your cat is dancing very nicely!
why don’t you make it dance on a stage?
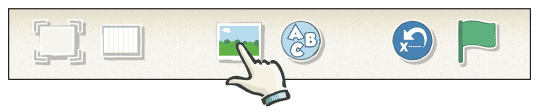
Let me take your cat to dance on a stage, instead of just a plain white background. You can select a new background by clicking on the button with the blue sky and green grass at the top of the main screen.
This is called the Change Background button.
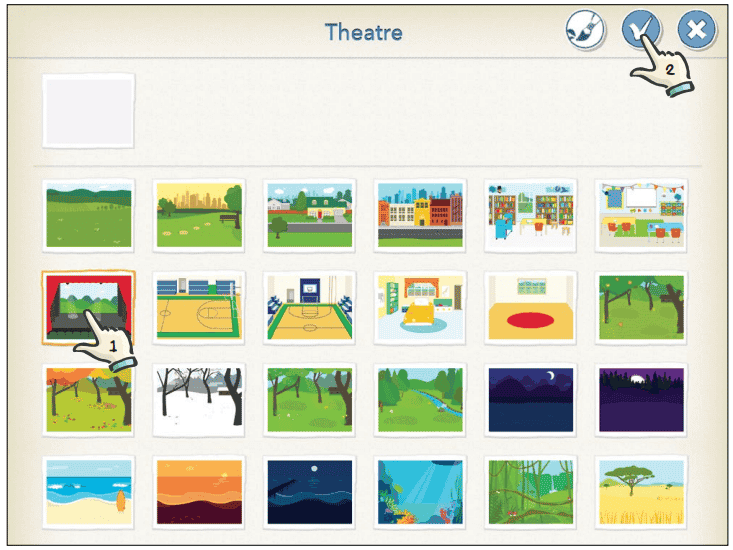
Here you can find lots of backgrounds that you can choose from. You can choose the background your choice that suits your project. But for this dancing cat, let’s choose the theatre. Click the check mark at the top to load it into your stage.
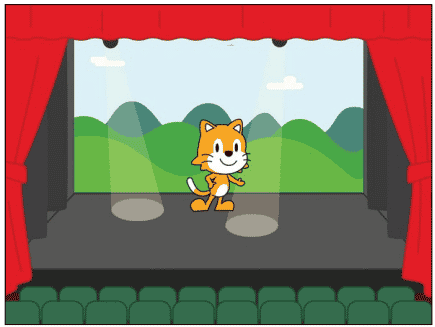
Congratulations! Your cat is a star!
Hey! Your cat is smiling and dancing, but it looks a bit lonely dancing on its own. . . .
Step 6: Add Another Character Scratch Jr
Let’s give your cat a partner on the stage to enjoy the dance party. Click the plus sign on the left side of your screen to add a character.

Now, you just scroll down the page, and you’ll see a good number of characters that you can choose from. Click the character you want to add, and then click the check mark to add it to your project. We’ve chosen the penguin.

Now your cat has one more partner on the stage. Notice that to the left of the stage is the character area, which shows you all the characters inserted in your project.
Note: The new character will always appear in the middle of the stage. To move the character, you can use your finger on a tablet or mobile and use the mouse while using a computer to drag it wherever you want on the stage. We’ve dragged each of our characters to the spotlight.

Did you notice that the script you wrote for the cat disappeared after you select the penguin?
Oh Yes!
Don’t worry! the script for the cat is still there!
It is in the cat’s programming area and now the penguin is selected where the screen is showing the programming area for the penguin.
Remember that, each character has its own script, like actors in a drama. To see the cat’s script, click the cat in the character area on the left, and you will see that your script is still there.
Now, select the penguin again so that you can write a script for the penguin to give some dancing movements for it.
Step 7: Don’t Just Dance, Make your Penguin Say Something!
You can make your penguin say something before it dances.
WoW! Oh my GOOOO…..!
Can a Penguin really speak?
Yeah, It’s possible to make your penguin speak, Virtually!!!
So, you need to add speech bubbles for characters using the purple Say block. Click the purple button in the block categories area to reveal the looks blocks.
Drag the Say block to the programming area.

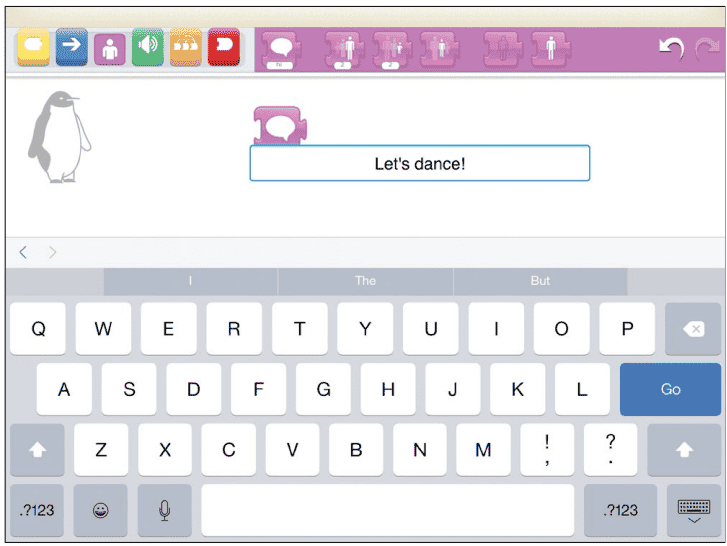
Now, change the text of the Say block from “hi” to “Let’s dance!”
First, Click the word hi to make the keyboard appear. Use the backspace key to delete hi, and then type Let’s dance! or whatever you want the penguin to say.
It’s time to add some blue motion blocks to make the penguin dance, and then put a Start on Green Flag block at the beginning of the penguin’s script.

Check, how your penguin performs the dance by clicking the Green Flag button ( ![]() ) at the top of the screen.
) at the top of the screen.
You’ll see that both the scripts for the cat and the penguin start running at the same time. When you click the Green Flag button, it will run every script that begins with a Start on Green Flag block for every character, all at the same time. This will be really useful as you make bigger projects with more characters.
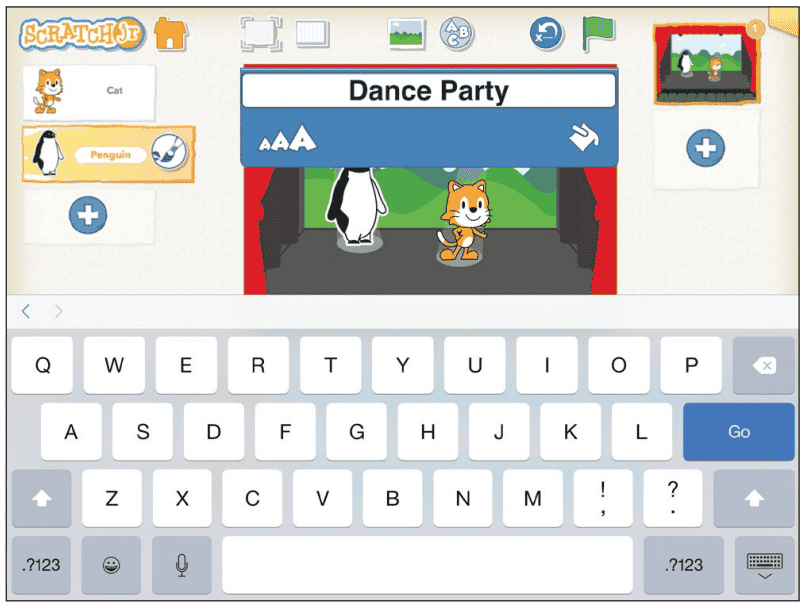
Step 8: Add a Title to Scratch Jr Story
You can add a title for the project on the stage by clicking the Add Text button ( ![]() ) at the top of the screen. In the window that pops up, type Dance Party as the title of the project. You can drag the title around the screen and place it anywhere you want.
) at the top of the screen. In the window that pops up, type Dance Party as the title of the project. You can drag the title around the screen and place it anywhere you want.
You can also change the text size and color by using the Change Size ( ![]() ) and Change Color (
) and Change Color ( ![]() ) buttons to change the size and color of the title you give your project. Play around and see what suits your stage best. Press Go to try it out on the stage. If you want to edit the title again, you can tap on the words to bring the text window back up.
) buttons to change the size and color of the title you give your project. Play around and see what suits your stage best. Press Go to try it out on the stage. If you want to edit the title again, you can tap on the words to bring the text window back up.
Step 9: Give a Name to Your Scratch Jr Project
It’s important to give a suitable and purposeful name to identify your projects. So, when you open the Scratch Jr again and see the projects on the home screen, you can identify the purpose of the project you have created. That is easy for tracking a project to modify or use for reference.
To give a suitable name for your project, click the yellow tab in the top-right corner of the screen.
Then delete the current project name (Project 1) and type Dance Party. When you’re ready to return to the main screen, click the check mark.

Sharing your creative work with your friend is very exciting!
So, if you want to send your project to someone else who has ScratchJr, you can do that also. Check the link for more details on how to share your ScratchJr projects.
Step 10: Save Your Scratch Jr Project
This is a common practice that we normally save projects after creating them, to save your project and go back to the home screen, click the Home button ( ![]() ) in the top-left corner. Your project will not be saved until you return to the home screen, so it’s a good idea to do this a few times while you are working on your project so that you don’t lose anything.
) in the top-left corner. Your project will not be saved until you return to the home screen, so it’s a good idea to do this a few times while you are working on your project so that you don’t lose anything.
To continue working on your project, just click the small image of the project on the home screen. This will take you back to the ScratchJr editor for that project.
Conclusion:
Congratulations!!!!
You have successfully completed the first lesson ” How to create a Dance Party Project ” in ScratchJr. The lesson covers all the required topics to make this projects complete. If you have any doubt check the ScratchJr Tips section.
If you want to learn more, write the topic or question in the comment box, I will try to bring a new lesson if required.
Feel free to subscribe to the email list to get more on this topic. And also subscribe to the STEM Guide YouTube channel for video tutorials.
